
.jpg)

.jpg)


iOS : Designing of the Data Model
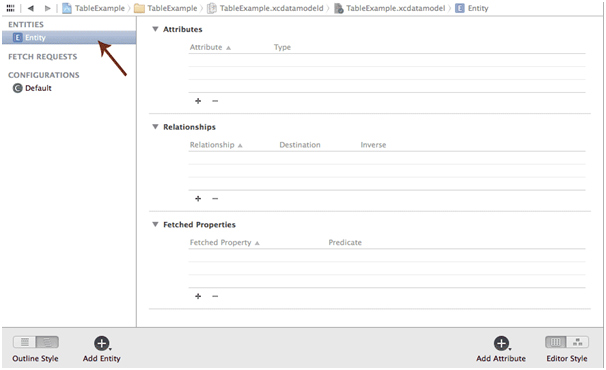
- Select TableExample.xcdatamodel to open Xcode's data model editor.(We have already started with the product name as TableExample...)
- Click the plus icon labeled Add Entity in the lower-left corner of the entity pane. This will create a new entity with the name Entity by default.
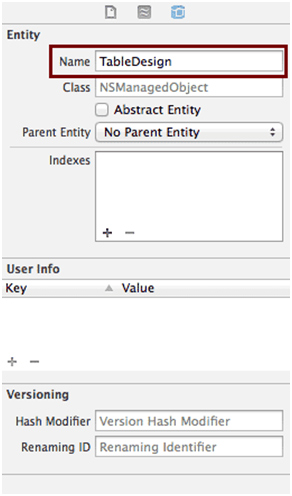
- Press Style for menu shortcut to open the data model inspector. At the moment, the inspector shows information about the entity we just added. Change the Name field from Entity to Table Design.
If you are in graph view then, you can see a little box representing our entity, which itself contains sections for showing the entity's attributes and relationships. Graph view is really useful if your model contains multiple entities, since it shows a graphic representation of all the relationships between your entities. If you're currently in Graph view, switch to Table view now. Table view shows more details for each piece of the entity we're working on, so it's usually more useful than Graph view when creating a new entity. In Table view, most of the data model editor is taken up by the table showing the entity's attributes, relationships, and fetched properties. This is where we'll set up our entity. Notice that at the lower right of the editing area, there's an icon containing a plus sign, similar to the one at the lower left, which you used to create the entity. If you select your entity, and then click the plus sign and hold down the mouse button, a popup menu will appear, allowing you to add an attribute, relationship, or fetched property to your entity.
Go ahead and use this technique to add an attribute to your TableExample entity. A new attribute, creatively named attribute, is added to the Attributes section of the table and selected. Change the new attribute's name from attribute to tableNum, and click the popup next to the name to change its Type from Undefined to Int16, which turns this attribute into one that will hold an integer value. This is how you can create as many attributes as you want for your application.
iOS : Concepts of Core data << Previous
Next >>Store data in core data
Support us generously: contact@lessons2all.com
Our aim is to provide information to the knowledge seekers.